Fitting a Hella Marine NaviLED 360 Navigation Light
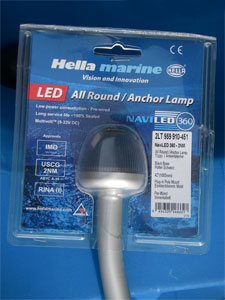
Hella Marine NaviLED 360 Navigation Light.
As your confidence and kayak fishing experience grows thoughts often turn to late evening or night fishing, in the right conditions and the necessary safety precautions taken, fishing at night can be a wonderful experience.
A kayak being paddled at night does not require a light to be shown by law, at anchor an all round white light is a legal requirement, commonsense tell you that at night such a small craft should be as visible as possible to other craft therefore we would recommend the use of an all round white light when paddling or fishing at night or in low light conditions.
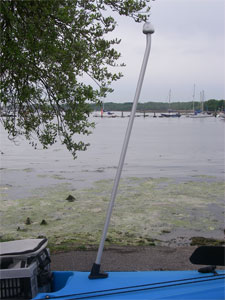
The very stylish Hella Marine NaviLED 360, is available in two different height versions, the 1070mm / 42” or the 610mm / 24” which we chose to fit to the Trident Project.
The NaviLED 360 requires fitting centrally on the deck, well it could be fitted off centre but it would look a little odd, the Trident's deck area behind the tankwell has a high ridge running centrally to the stern, this requires more work and a little thought when fitting.
So that the NaviLED 360 base could sit securely over the ridge it was necessary to make a gasket.
We bought a sheet of Funky Foam from our local craft store, this was only available in 2mm thickness and we required a 4mm gasket, we cut 2 rectangles out of the foam and glued them together with a waterproof contact adhesive, once dry we drew a line through the centre, using the base as a template we marked the required hole and cut by hand using a sharp craft knife. Fitting the foam to the Navlight base we drew around the outside of the base, removed the foam and hand cut to shape, we slipped the gasket back on the base and tidied up with our Dremmel, this could be done equally well with some sandpaper.
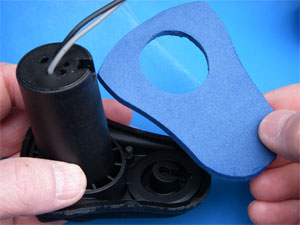
4mm Funky Foam gasket..
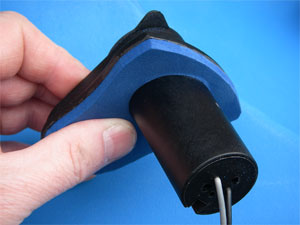
The gasket then had to be shaped around the ridge on the deck, so we wrapped a piece of glass paper onto a piece of wooden dowel and sanded along the centre line until we were down to the glue testing for fit along the way.
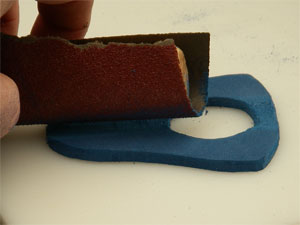
Shaping the gasket to fit the Tridents ridged deck..
Placing the gasket in our chosen position using a piece of green shockleader tied between the bow and stern as a centre line, we aligned the gasket and marked the centre of the hole for drilling.
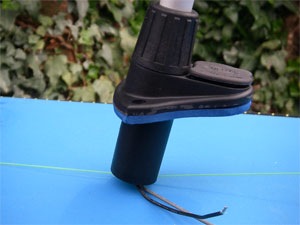

Checking the position and angle of light, marking the hole for cutting.
Using a hole cutter drill piece we drilled at a slight angle to accommodate the angle of the Navlight base, after tidying the hole the base was checked for fit.
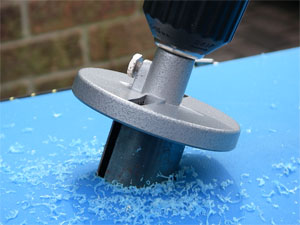
Cutting the hole to accommodate the base, note cutting at an angle..
Because of the position and access problems we had to fix the base with rivets, the screw holes in the base had to be enlarged slightly to accommodate the rivets. With the base in position we drilled through the base and marked the deck for drilling, removing the base before drilling proper.


Marking the fixing holes through base, note rear rivet holding base in place..
The base is supplied with only a few inches of cable so we had to fit a cable block to join the new length of cable, once the joint was tested by connecting the battery up and checking the light worked, we wrapped the block with duck tape ensuring a watertight seal.

Extending the cables with the help of a cable block..
A small watch lead was tied to the end of the cable to aid threading the cable through the hull, tipping the hull up at the rear allows the weight to slide forward towards the Rod Pod.
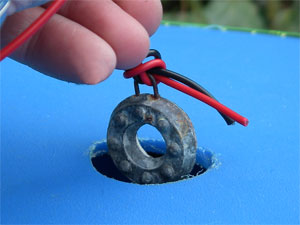
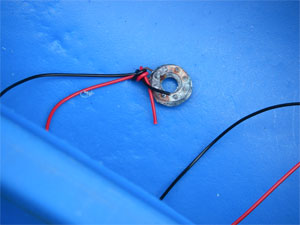
Small watch lead, used to aid threading cables through the hull.
The base was held in position centrally a large blob of silicone sealant adhesive was squeezed around the mount base before fitting, once in position the first rivet was fitted followed by the other two. The excess silicone sealant adhesive was wiped away immediately.
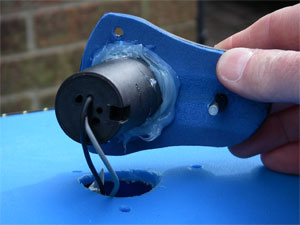
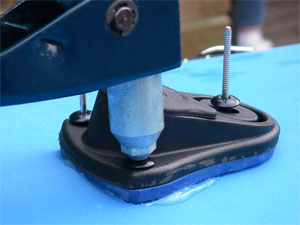
A good dollop of sealant before riveting.
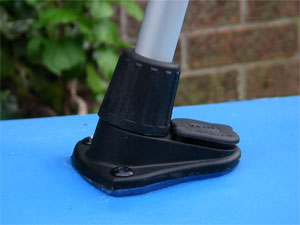
The base fitted.
Next up the battery box, we used an airtight sandwich box which will accommodate our 3.3amp battery comfortably. A smaller capacity battery could be used, but we had a spare 3.3amp so used it. The sandwich box was fitted with a waterproof switch in one end allowing for the battery to fit next to it, cables fitted and the light tested, we didn't feel the need to fit an inline fuse.
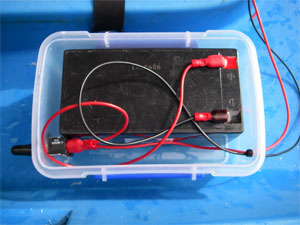
Battery box layout.
The battery box is fitted beneath the seat but with the switch easily accessed via the rod pod. The box is held in position using a Lash-It strap, available directly from kayakuk.com
Lash-It.
What a beauty.
Disclaimer:
Installing hardware may cause damage and/or void manufacturer warranties.
The information we provide is a free reference guide only. The author of this information, sponsors and the owners of the website that host this information are not liable for any problems or issues that arise from the use of this information. Users of this information hereby acknowledge that all use of this information is done by their own free will, at their own sole risk, understanding that injury or death could occur.