Fitting an Eagle Fishfinder 240i/GPS to an Ocean Kayak Prowler Elite 4.5 - Manuel "Albatros" Málaga, Spain
My objective was to fit an Eagle Fishfinder 240i/GPS to my New Zealand built Ocean Kayak Prowler Elite 4.5, the Elite 4.5 along with some of the new Ocean Kayak models has a space specifically for the fitting of a transducer, the space is moulded to accept a Humminbird transducer using the Ocean Kayak fitting kit.
For several reasons I wanted to use a different method of fixing the Ocean Kayak Fishfinder fitting kit was not compatible with my Eagle Fishfinder, it is difficult to purchase in Spain and it was a little expensive.
I decided to devise a system that was simple, gave a good quality finish, didn't encroach on the area set aside for the Plano Tackle Box.
It came apparent that I would have to make a mould using the same resin that had served me so well when fitting a transducer on my old kayak. The product was easy to apply and remove should things go wrong, with a workable hardening time, low chemical reaction temperature during hardening, a material that is not fragile, and sets hard enough to be able to drill, screw and fit the finder display directly to it.
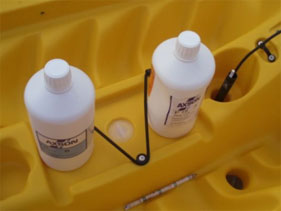
After a lot of research I finally found the solution, Axson F18 two part resin.
Materials used:
- 15 cm pvc tube - to isolate the cable from the resin
- 6mm bolt and nut to join both moulds
- Vaseline - as a mould releasing agent
The mould was made in two parts; Part 1 fixes the transducer to the keel transducer space, Part 2 forms the base to attach the Fishfinder display. With the mould being made in two parts it makes for easy disassembly if necessary.
Manufacturing:
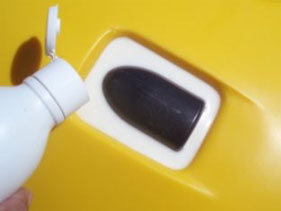
Placing the kayak keel upwards and ensuring that the kayak is perfectly level, we applied a small amount of vaseline to the walls that formed the mould, to allow disassembly should the need arise.
2 Part epoxy.
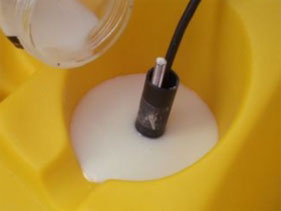
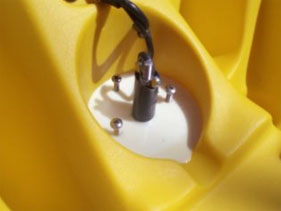
The transducer, bolt and power cables were then passed through the transducer hole to the deck, the cables covered with the plastic tubing to protect them from the epoxy, the plasticine was used to fill to top section of the transducer hole. With the transducer in position 200cc of epoxy was mixed and carefully poured around the transducer. The epoxy has approximately 8 minutes wrorking time and is touch dry in 45 minutes.
Pouring in the mixed epoxy.
Once touch dry the plasticine was removed from the top side of the transducer hole, a small amount of plasticine was left at the base of the hole to keep the two mouldings apart, the plastic tube protecting the transducer cables was pressed down into the plasticine.
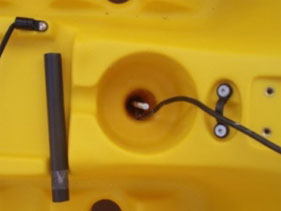
Plasticine removed showing bolt and cables in position.
With the kayak turned and level across the gunwales, but with the bow raised 5 degrees to allow water to run off the new base. The freshly mixed resin was then poured into the mould.
Epoxy poured to form top of moulded base.
Once the second part of the mould was set, the Eagle finder base was placed in position on top of the mould and the fixing holes marked onto the mould, holes were then drilled using a 2mm drill bit allowing screws to be fitted to hold base in place. But before doing so, both parts of the mould had to be joined together with the 6mm threaded section and bolted together.
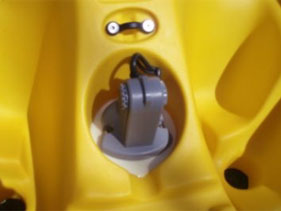
Finder base holes drilled and screws in situ, base fitted.
The mould is complete.
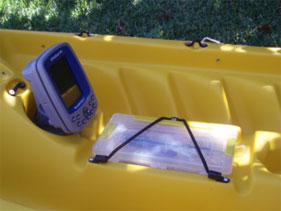
Eagle Fishfinder/GPS fitted.
I have not included the wiring up of the fishfinder as this has been covered many times before in other articles.
So now there are two methods of fitting a fishfinder to the Prowler Elite 4.5, one Made in New Zealand, the other Made in Spain.
Thanks to Otto my good friend, workmate and advisor for helping me with this project, which has now been thoroughly tested, knocked and abused but continues to perform in perfect order.

Otto resting after product testing.
Disclaimer:
Installing hardware may cause damage and/or void manufacturer warranties. The information we provide is a free reference guide only. The author of this information, sponsors and the owners of the website that host this information are not liable for any problems or issues that arise from the use of this information. Users of this information hereby acknowledge that all use of this information is done by their own free will, at their own sole risk, understanding that injury or death could occur.